

Most AI photo editing guides show you a slider and a before/after thumbnail. That is not enough. Thumbnails hide exactly where these models fail: cutlines, small text, hands, hair, reflective edges, and repeated texture. Based on hands-on comparison and current public documentation for major AI photo editors, here is a beginner workflow that keeps AI useful without pretending it is magic.
What does “using AI for photo editing” actually mean?
Using AI for photo editing means handing specific, repetitive pixel tasks to trained models — cutting out the subject, cleaning distractions, improving sharpness, extending the frame — while you keep every creative and factual decision. You still shoot it, sequence the edits, and approve the output. The tool does the labor; the judgment stays yours.
In practice, AI is reliably useful for four jobs and riskier around anything that requires exact fidelity:
- Reliable: masking a subject from a busy background, removing simple stray objects, improving soft phone files, filling empty space to change aspect ratio.
- Risky: anything with hands, printed logos or type, repeating fine texture, jewelry, hair against a similar tone, and reflective surfaces.
That split is the whole workflow. Use AI for the first list. Check the second list manually before you publish.
What is the fastest beginner workflow from raw shot to publish?
Shoot slightly wide and well lit, pick one AI editor, then run edits in a fixed order: cleanup, background removal, relight or shadow adjustment, upscale, generative expand, manual inspection at 100% zoom, export. Order matters — upscaling before background removal can bake in bad edges, and expanding before lighting adjustments can produce mismatched lighting across the new pixels.
The seven-step chain
- 1. Shoot for the machine. Fill most of the frame, keep the background visually distinct from the product, avoid mixed color temperatures. Every minute here saves time later.
- 2. Global corrections first. Exposure, white balance, straighten. Do this in Lightroom, Photos, or your phone editor — not with generative AI.
- 3. Remove the background. One click in many modern tools. Then zoom to 100% and check the cutline where the subject meets the background.
- 4. Relight or add shadow. Add lighting and a matching contact shadow where the tool supports it. Without a shadow, cutouts float and look fake.
- 5. Upscale conservatively. Moderate upscaling is safer for product photos than aggressive enlargement, especially when labels, logos, or texture matter.
- 6. Generative expand. Extend to your target ratio after the light is settled.
- 7. Inspect and export. View at 100%, check the failure list, export at the platform’s required size.
For marketplace listings, check the destination’s rules before exporting. Amazon’s seller guidance, for example, says main images should use a pure white background (RGB 255,255,255), show the product clearly, and have the product fill most of the frame. Amazon recommends images larger than 1,000 pixels on each side to support zoom; many sellers aim higher, but the exact requirement can vary by category and listing context.
Which AI photo editors handle the whole chain?
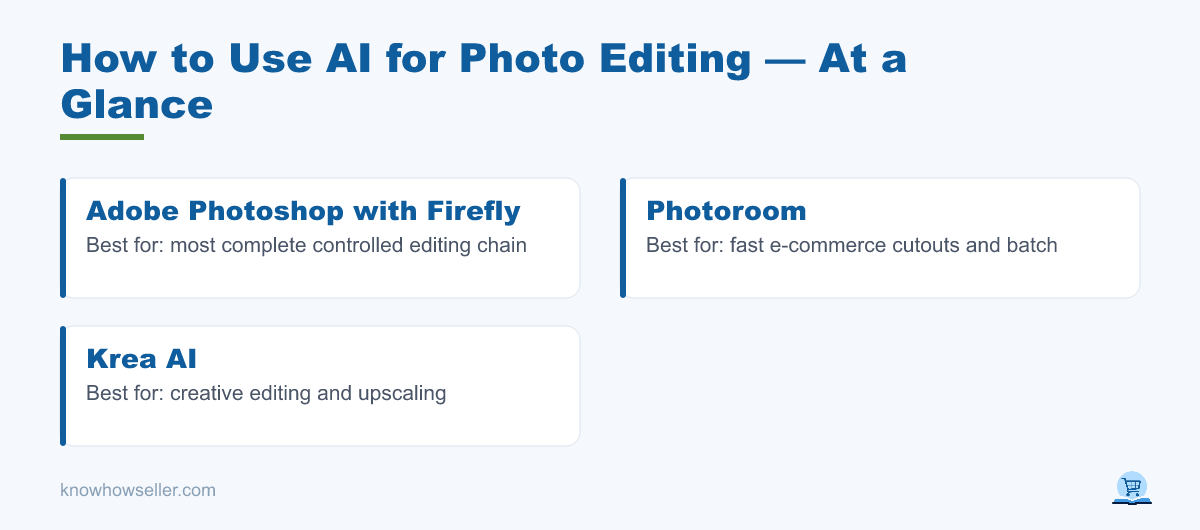
Few tools cover the whole chain in the same way. Adobe Photoshop with Firefly is the most complete for controlled editing; Photoroom is built around fast e-commerce cutouts, backgrounds, shadows, and batch workflows; Krea AI is strongest as a creative editor and enhancer/upscaler, with browser-based tools for background removal, expansion, and prompt-based edits. Below is a practical comparison based on publicly documented features and typical workflow fit.
| Capability | Photoshop (Firefly) | Photoroom | Krea AI |
|---|---|---|---|
| Background removal | Available with editable professional workflows | Core feature, designed for fast product cutouts | Available through Krea background remover and Edit |
| Relight + contact shadow | Manual control plus AI-assisted tools such as Harmonize for compositing | AI Shadows and product-photo presets are a core workflow | Prompt-based lighting/background edits; less catalog-specific |
| Upscale | Generative Upscale is available in Photoshop/Firefly workflows | Image Enhancer and HD/UHD export options are plan-dependent | Enhance/upscale is a major feature, with higher limits on paid tiers |
| Generative expand | Generative Expand is a documented Photoshop feature | AI Expand/Resize is available in Photoroom workflows | Image expansion is available in Krea’s AI editor |
| Learning curve | High | Very low | Low to medium |
| Best for | Controlled hero images and final retouching | Bulk catalog work and marketplace images | Creative enhancement, upscaling, and fast visual variations |
| Watch out for | Time cost per image and subscription complexity | Plan limits, credit rules, and preset-looking outputs | Fidelity drift when prompts or enhancement settings change exact details |
What did one product photo reveal about all three tools?
A useful beginner test is simple: take one product photo with a hand, a printed label, and visible material texture, then run the same edit chain in each tool you are considering. Do not judge the thumbnail. Export the same final size from each tool and compare 100% crops on the parts that usually break first.
The 100% crop findings
- The hand or edge detail. Check fingertips, nails, hair, transparent plastic, glass, and the contact edge where the object meets the background. AI masks often look clean at preview size but show clipped edges or softened detail when enlarged.
- The printed wordmark. Logos and small type are the hardest fidelity test. An upscale can make text look sharper while quietly changing letterforms. If the label matters legally or commercially, compare it against the original before publishing.
- The matte or fine texture. Product materials such as fabric, ceramic glaze, leather grain, brushed metal, and paper can be flattened or replaced with a synthetic pattern. The output may look polished but less true to the product.
- The generative expand seam. Inspect where original pixels meet generated pixels. Look for mismatched grain, color temperature shifts, warped counter lines, or background patterns that repeat too evenly.
Use this as a pass/fail inspection map, not a benchmark score. A tool that wins on one photo can fail on another because the source image, prompt, model, and export settings all matter. The reliable habit is to inspect the same risk areas every time.
Practical editing rule: judge AI photo edits at 100% zoom on the hardest part of the frame, not on the thumbnail.
How do you shoot so the AI has less to invent?
Give the model information instead of asking it to hallucinate information. Shoot wider than your final crop so generative expand has less work, light from one clear direction so lighting tools have a coherent starting point, and keep logos and text large and parallel to the sensor so upscalers do not have to guess letterforms.
- Leave a reasonable margin around the subject; expand fills small gaps far better than large ones.
- Turn off in-camera beauty smoothing — it destroys the texture upscalers need.
- Shoot the highest resolution your phone allows, and shoot RAW or ProRAW if available.
- Photograph text-bearing surfaces square-on, not at an angle.
E-commerce usability research from groups such as Baymard Institute consistently emphasizes that shoppers rely heavily on product images, zoom, and detail visibility when evaluating products online. That is the real argument for improving resolution, and the real argument against upscaling so hard that product details become fiction.
Do you need to disclose AI edits before publishing?
It depends on what the edit changes. Cleanup, relighting, and cropping are conventional retouching. Edits that alter what a product is, includes, or looks like in use can cross into deceptive advertising, and most platforms treat that as a policy issue regardless of how the image was made.
- Provenance metadata. The C2PA Content Credentials standard is designed to preserve information about how media was created or edited. Google has documented support for showing compatible C2PA information in surfaces such as “About this image” when the file and signer meet its requirements. Leave provenance metadata intact when your workflow supports it.
- Advertising truthfulness. US Federal Trade Commission principles on deceptive advertising apply to the overall impression created by an ad, including imagery. A product photo should not misrepresent what the buyer receives.
- Platform rules. Marketplaces publish their own image policies. Check them before batch-processing a catalog, not after.
Practical rule: if a customer would feel misled holding the product next to your image, the edit went too far.
What should a beginner do first?
Pick one tool and run five of your own photos through the full seven-step chain end to end. Do not tool-hop. You learn far more from watching one editor break the same way five times than from sampling five editors once each.
Start with Photoroom if you shoot products and need volume, Krea if your archive is small or soft and needs enhancement or creative variation, Photoshop if a handful of hero images have to be carefully controlled. Then apply the one habit that separates publishable AI editing from obvious AI editing: zoom to 100%, and look at the hands, the text, and the texture before you hit export.